How to Change the IP Address on Your Android: A complete guide
Changing your Android’s IP address is a useful way to secure your online privacy and get around geoblocks on number of websites and streaming services. Choosing and installing a reliable VPN service is the simplest and most secure approach to change your Android device’s IP address. Other ways to change the IP address on Android include using proxies or even asking your Internet Service Provider (ISP) for a new IP address. But, the most of them risk your privacy and security.
Continue reading for easy steps on how to change your Android device’s IP address. Furthermore, you will learn how to select the best VPN for the task at hand and investigate additional methods for changing your Android IP.
Find a Network IP for Your Android
You must put a free IP address on your network before configuring your Android with a static IP. Take these actions:
On a Windows PC:
- Select the Start button.
- Enter “cmd” and select the desktop application for Command Prompt.
- Enter the command “ipconfig/all” into the command prompt window.
The results will comprise a variety of data, but pay deep attention to three significant points:
- Default Gateway: This is your home router’s IP address, for example, 10.0.0.1.
- IPv4 Address: This is your computer’s IP address, such as 10.0.0.158.
- DNS Servers: They are used by your ISP to look up domain names.
Find a Free IP Address
Use this ping command to get a free IP address on your network:
- Launch the Command Prompt once again.
- Initiate by putting “ping” and the IP address of the router (for example, “ping 10.0.0.1”) and work your way up.
- If you receive a response from a ping, the IP address is already in use. If it says, “Destination host unreachable,” it can be accessed.
The same commands can be function similarly on a Mac by launching the terminal and following the same way.
Change the IP Address on Your Android
Following these steps will let you to change your Android device to a static IP address now that you have a free IP address:
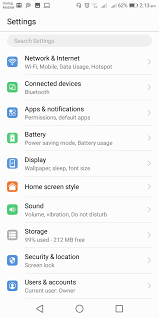
- Go to “Settings” from the Android menu.
- Tap “Network & internet” then “Wi-Fi.”
- When you click and hold the Wi-Fi network that is linked, a menu will appear. Select “Modify network.”
- You might have to “Forget” the network and re-enter the password in addition to the IP address changes, depending on the version of Android you are using.
- Scroll down to “IP settings” under “Advanced options” by clicking that option. Change the DHCP configuration to Static.
Manually Configure Your Android’s Network Settings
To manually change the remaining network settings on your Android after switching the IP to Static:
- IP Address: Type the IP address that is currently available after using the Ping command to get it.
- Gateway: Enter the earlier noted default Gateway IP address.
- Enter the IP addresses of DNS servers DNS 1 and DNS 2 in the suitable fields.
Leave the default values in the other fields on this form. When completed, click “Save.” The new static IP address allocated to your Android smartphone will now let it to re-join your home network. Any app you are using can be set up to connect to your Android device using this new, fixed IP.
Remember, even after a reboot, your Android will continue to use this static IP. Use the same approaches to return to DHCP, but change the IP Settings option back to DHCP in the Advanced Options panel.
Your capability to control your network and use your Android device for a variety of complicated tasks can be substantially enhanced by changing the device’s IP address. Enjoy the advantages of a static IP on your Android device by carefully following these instructions.

